Wednesday 23 December 2015

Christmas 2015.....

Hello all,

Well, 2015 is almost over, what a year..... not what I expected of this year, certainly did not expect to lose my mom so suddenly - it completely threw me out of sync and have struggled to get back to my normal self and normal routine. So.... I can hear you telling me mom; get on with it! So I have started on my 2016 Christmas cards already - I will be prepared next year.

I have had a lovely afternoon stamping and colouring in and using distress inks, glitter and gems, embossing powders, etc.  What more can I ask for, a lovely way to spend the afternoon.

This is my FIVE creations this afternoon - about 495,000,000 left to make.....


TTFN, Happy Christmas and Happy New Year all.

Debs xx


Sunday 8 November 2015

projects for next workshop.....

Our next workshop is Sunday 15th November, we will be making chalk board fridge magnets "sleeps till Christmas" plaques, and also let it snow cards.

We will also be doing the following projects at the next two workshops before Christmas.

3D Christmas tree with shrink plastic baubles
stamped and coloured candles

booking - Angel, Christmas tree, Snowflake - and decorating the covers using inks, stamps, embossing powders, distress inks, etc.

Everyone is welcome to attend, all levels are catered for.

Love Debs x

Sunday 25 October 2015

workshop dates for 2016

Hello all,

Well, I am back from my holiday and back to crafting again.  I have booked the dates for my 2016 workshops, all levels of crafters are accommodated and it is a fun and friendly group of like minded people.

The dates for 2016 workshops are:

Jan 10              Jan 24            Feb 14
Feb 28             Mar 13          Apr 3
Apr 17             May 8            May 22
Jun 5                Jun 23           Jul 3  
Jul 17               Aug 7             Aug 21
Sep 4               Sep 18           Oct 2
Oct 16             Oct 30           Nov 13
Nov 27            Dec 11

The Venue, Lench's Trust, Ridgeacre Rd, Quinton, Birmingham. B32.

Everyone is welcome, come along and join the fun, hope to see you there.

Love Debs x

Tuesday 25 August 2015

PICTURE PERFECT..... POPPIES

Hello all,

Well, have I been having a right crafting session or what!

I have made a beautiful set of pictures, in lovely white ornate frames.

I used a piece of white centura pearl card and embossed with swirls and butterflies and distress inked in red ink.

I stamped and die cut poppies (3 leaves for each poppy) and coloured with spectrum noir pens (DR1,3,5,6), I then sprayed the poppies with pearl diamond spray.

I stuck the poppies together and added black liquid pearls to the centre, I glued each poppy in the centre of the embossed card and stamped and cut leaves to put around the three poppies I placed on the embossed card

Finally I stamped a sentiment and inked round this in red distress ink and added to the bottom corner of the embossed card.

I put the embossed card and poppies back in the frame but put the glass behind the picture for stability then put the back on the frame.

This is the finished results.


Happy crafting.  TTFN.

Debs xx

PS.  we will be making these in our October workshop.


Monday 17 August 2015

6 x 100 birthday cards.....

Hello,

I was asked at the end of last week if I could do 6 - 100th birthday cards, all based on similar cards I have previously made.

I do enjoy any reason to craft, so this is what I made.


TTFN, happy crafting.

Debs x

Saturday 18 July 2015

Chalk boards lbs lost fridge magnetic board

For sale.  Hand made chalk boards Magnetic, shows lbs lost this week and stones / lbs lost in total.

Can make colours to suit £3 each plus postage.  Contact me on thecraftdemon@gmail.com if you are interested in purchasing one.

Friday 10 July 2015

The Printable Craft Shop - Butterfly Kisses and Cute as can be Acetate Card

Hello again,

What an enjoyable afternoon I have had using the new Diamond Bundle - Butterfly Kisses and Cute As Can Be ranges from The Printable Craft Shop, they are so cute and you can do so much with them.

For this project I wanted a bit of movement, so decided I would be using acetate for this.

I started with a piece of A4 acetate and cut to 16 cm wide and 28 cm long and folded in half.

I took a piece of card 16 cm x 20 cm and score at 2 cm, 4 cm, 7 cm, 10 cm and 15 cm, I mountain and valley folded this to create a step card, I printed the backing paper from the Cute as can be range and layered this on to gold miri card and stuck to the back step and middle step of the card.

I stuck the acetate to the back step of the card (on the back) and the front of the acetate to the front step of the card, I then added the matt and layer over the acetate on the front step.

I printed two topper sheets from Butterfly kisses and cut out twice, I created one decoupaged topper which I stuck on the back step of the card and used the other topper sheet to cut out individual bees and butterflies and stuck them around the card on the acetate so it looked like they were flying.

To get your hands on this beautiful range and loads more, please visit the Printable Craft Shop.

http://printable-craftshop.com/boutique/designers/arda-cards/card-kits/upright-diamond-fold-card-bundle


TTFN, Happy crafting.

Debs

Design Team Member The Printable Craft Shop
www.printablecraftshop.com

http://printable-craftshop.com/boutique/bmz_cache/a/ab89eef3fa2ebe2e06bda8e2eec924db.image.300x300.jpg

The Printable Craft Shop - diamond fold bundle

Hello again,

Its project time again for the design team at The Printable Craft Shop,

This time we are working with the Diamond Bundle, they are so versatile - you can make the diamond card as designed for, but you can adapt them to any sort of card, just cut into them.

For my first project, I used the "perfectly & Incandescently Happy" pack, I printed out the backing paper twice, and the base card and the topper sheet.

I started with a piece of A4 card folded it to make an A5 card and trimmed down to 14 cm x 14 cm to make a square card.

I diagonally cut the front of the card in half.  I matted black card stock on the inside of the card and on the triangle front of the card, and layered the backing paper to this.

Using the vase card, I cut the sentiment section off into a square, and layered this onto black card and put in the inside of the card, I added glitter and pink gems.

On the front of the card, I added a white ribbon and bow and added a gem to the centre.  I cut out the topper sheet and layered up the decoupage and matted this onto black card, I added glitter and gems to this and stuck this to the front of the card in the centre, I finished with the roses from the topper sheet.


A beautiful wedding card - please visit The Printable Card Shop for all items used.

The Printable Craft Shop Diamond Bundle


TTFN, happy crafting

Debs

Design Team Member The Printable Craft Shop
www.printablecraftshop.com

Sunday 28 June 2015

Sleeps till.....

Just designed a new workshop project,  how many sleeps till......

What this space for project details x

Crafting Workshop - Sunday 5th July.....

Hello all,

Our next crafting workshop is Sunday 5th July at 10am at Lench's Trust, Ridgeacre Rd, Quinton, Birmingham, B32.  Come along and join the fun.  We will be making the following projects, the theme is babies:

Baby washing line card and stair step card.


Come along and join in the fun.

Happy Crafting

TTFN

Debs x


Rosette Step Card

Hello,

Me again, The second card I made this weekend is a step card.  

I started with centura pearl card in ivory and scored along the width 3 cm in and 3 cm wide from the bottom, I did his on both sides, and again at 6 cm up till 3 cm wide, I then folded these score lines in for mountain and valley folds, I put the front and back corners together which showed me where the rest of the folds fall naturally, I then scored and folded this lines.

I matt and layered gold and ivory card stock on to all panels, and added printed sentiments to the side panels along with pearls.

For the main image, I created a rosette, I cut a piece of gold card stock 3 cm x 30 cm and score along it at 1 cm intervals, and mountain and valley folded these.  I joined both ends together and stuck die cut scalloped circle to front and back in gold to secure, I then printed "Pearl" on centura pearl ivory card stock and die cut in a slightly smaller scalloped circle and put in the centre of the rosette, again I added pearls to this, finally I cut two tails for the rosette and stuck to the back of the rosette and stuck the rosette to the front of the card, I printed and die cut a sentiment and added to the inside of the card  - and this is the finished result.


TTFN

Happy Crafting

Debs x


Bags and Shoes Card

Hello again,

Well, I have had a lovely crafting weekend, and have made some fun cards, which a lovely lady asked me for.  The first card is a wiper card - without the wiper element.

I took 2 pieces of centura pearl white card and scored at 5 cm and at 9 cm from both long ends.  I trimmed the width to 16 cm.  I die cut two edge-ability sentiments at each end of the front piece of card.  On the back piece of card, I cut out two dark purple pieces of card 16 cm x 5 cm and stuck them to the two ends of the back piece of card, I then stuck the two ends of the front and back pieces of cards together, and opened the 2nd score lines into mountain folds, which then causes a box like effect for the card.

Using Robert Addams shoes and bags dies, I die cut various colours of bags and shoes, and using the backing paper from Robert Addams website for the shoes (a display stand effect) I cut this to size and layered on to the dark purple card and put on the front of my card, I added bags and shoes.

To finish I printed a verse and die cut this and stuck to the back of the card.

This is the finished result.


TTFN

Happy crafting.

Debs x

Wednesday 24 June 2015

The Printable Craft Shop - Spring Curly Mouse Box Card

Hello again,

I am loving the designs from The Printable Craft Shop, there is so much to choose from and the images and papers are beautifully designed and print perfectly.  I have attached the link to their website below.

http://printable-craftshop.com/boutique/
http://printable-craftshop.com/boutique/designers/paper-creator/ultimate-kits-mega-bundle

I used the Spring Curly Mouse designs from The Printable Craft Shop:

Backing paper 3
Backing paper 4
Small Topper Sheet
Curly the mouse spring image
Bows
Tag
2 x sentiments (If friends were flowers I'd pick you and Wishing you the happiest of birthday's)

I decided to make a box card, I started with an A4 piece of card stock and score down the width at 7 cm, 14 cm, 21 cm and 28 cm, I then turned 90 degrees and scored at 12 cm.

I then cut down the 4 score lines to the 12 cm horizontal, and trimmed off the extra bit (top section only - keep the bottom section to form a tab to stick the box together).

Fold each score as a mountain fold and attach the tab at the end behind the first panel to form a box shape.

Using spare card cut two strips of card 1 cm by 9 cm and score 1 cm from each end.  These are glued inside the top of the box part of the card as they form frames to glue your characters/toppers to.

Using backing paper 4 as the matt and backing paper 3 as the layer, I created matt and layered on the bottom sections of the box, and on the fold down section at the top of the box.

I made up 4 bows and added a gem to each one, I cut out the spring Curly the mouse image and glittered the flowers.

I die cut the sentiments with pretty frames and inked round the edges with a soft pink distress ink - spun sugar.

From the small topper sheet I cut out the two border strips.

I trimmed the border strips down to size and glued to the front of the box and to each of the inside tabs.  I then stuck the main image to the back tab, and the sentiments to the back /top of the box and the front panel, I added the finished bows to the box to finish.

The good thing about this card is that it folds virtually flat and fits into an A5 envelope.  It is one of my favourite card types, its so versatile and can you can see from the card pictures below, you do not need to add too much to it to make a stunning card.


Happy Crafting

TTFN

Debs x

The Printable Craft Shop..... Daffodil Bunny Thank You Card

Hello All,

I have had such a fun evening crafting with items from The Printable Craft Shop, I have put the link to their website below. They have such wonderful papers, toppers, decoupage, bows and so much more, some lovely cute characters as well.

http://printable-craftshop.com/boutique/
http://printable-craftshop.com/boutique/designers/paper-creator/ultimate-kits-mega-bundle

I have made the following card using the following items from The Printable Craft Shop.

Daffodil Bunny Selection:

Thank you circle sentiment
Daffodil Bunny tag
Backing paper 3
Backing paper 4
Backing paper 6
Backing paper 7
Backing paper 8
Coloured Daffodil Bunny - printed twice
Bows

I started with am 8x8 card blank and used backing paper 3 as my base layer and matted backing paper 8 over this.  I then made a border strip with backing paper 4 and layered backing paper 6 on to this,  I added the border strip to the bottom of the card about 1 cm up, I created a pocket with this border and only sealed the two side edges and the bottom, so I could tuck the tag in the pocket at an angle to the right.

Using backing paper 7, I cut out 7 individual flowers to use as embellishments to my card, I added glitter to these flowers and added a pearl to the centre of each flower and put aside to use at the end.

I cut out the sentiment and added glitter around the edges to make a lovely topper/sentiment and stuck this on to the tag, I added a bow to this and attached one of the flowers to the bow.

I cut out both Daffodil Bunny images and cut the butterfly off one image to use on the tag next to the sentiment, I then layered both Daffodil bunnies together creating a bit of height between them so there was dimension to the card.  I glittered the butterflies and the Daffodils.

I finished the card by adding three flowers to the top left and bottom right.

Such a summery card, lovely and fresh and bright.  I love these colours.


TTFN

Happy Crafting

Debs x

Tuesday 23 June 2015

Graduation cards x 4.....

Hello all,

What can I say about the last couple of months - its had some very high highs and some very low lows.

I celebrated my 45th birthday last Tuesday at work, my very first ever worked birthday, and can I say a special thank you to Sabina and Tasmin, you made it so special for me, thank you so much, it meant such a lot to me.

So, I thought it was time I got back to blogging again and have made 4 graduation cards for a lovely lady at work who's daughter and 3 best friends who are graduating.....

Therein lies the the dilemma.... how do you make 4 different graduation cards for 4 friends so they do not all look the same - hopefully I did.

What do you think...

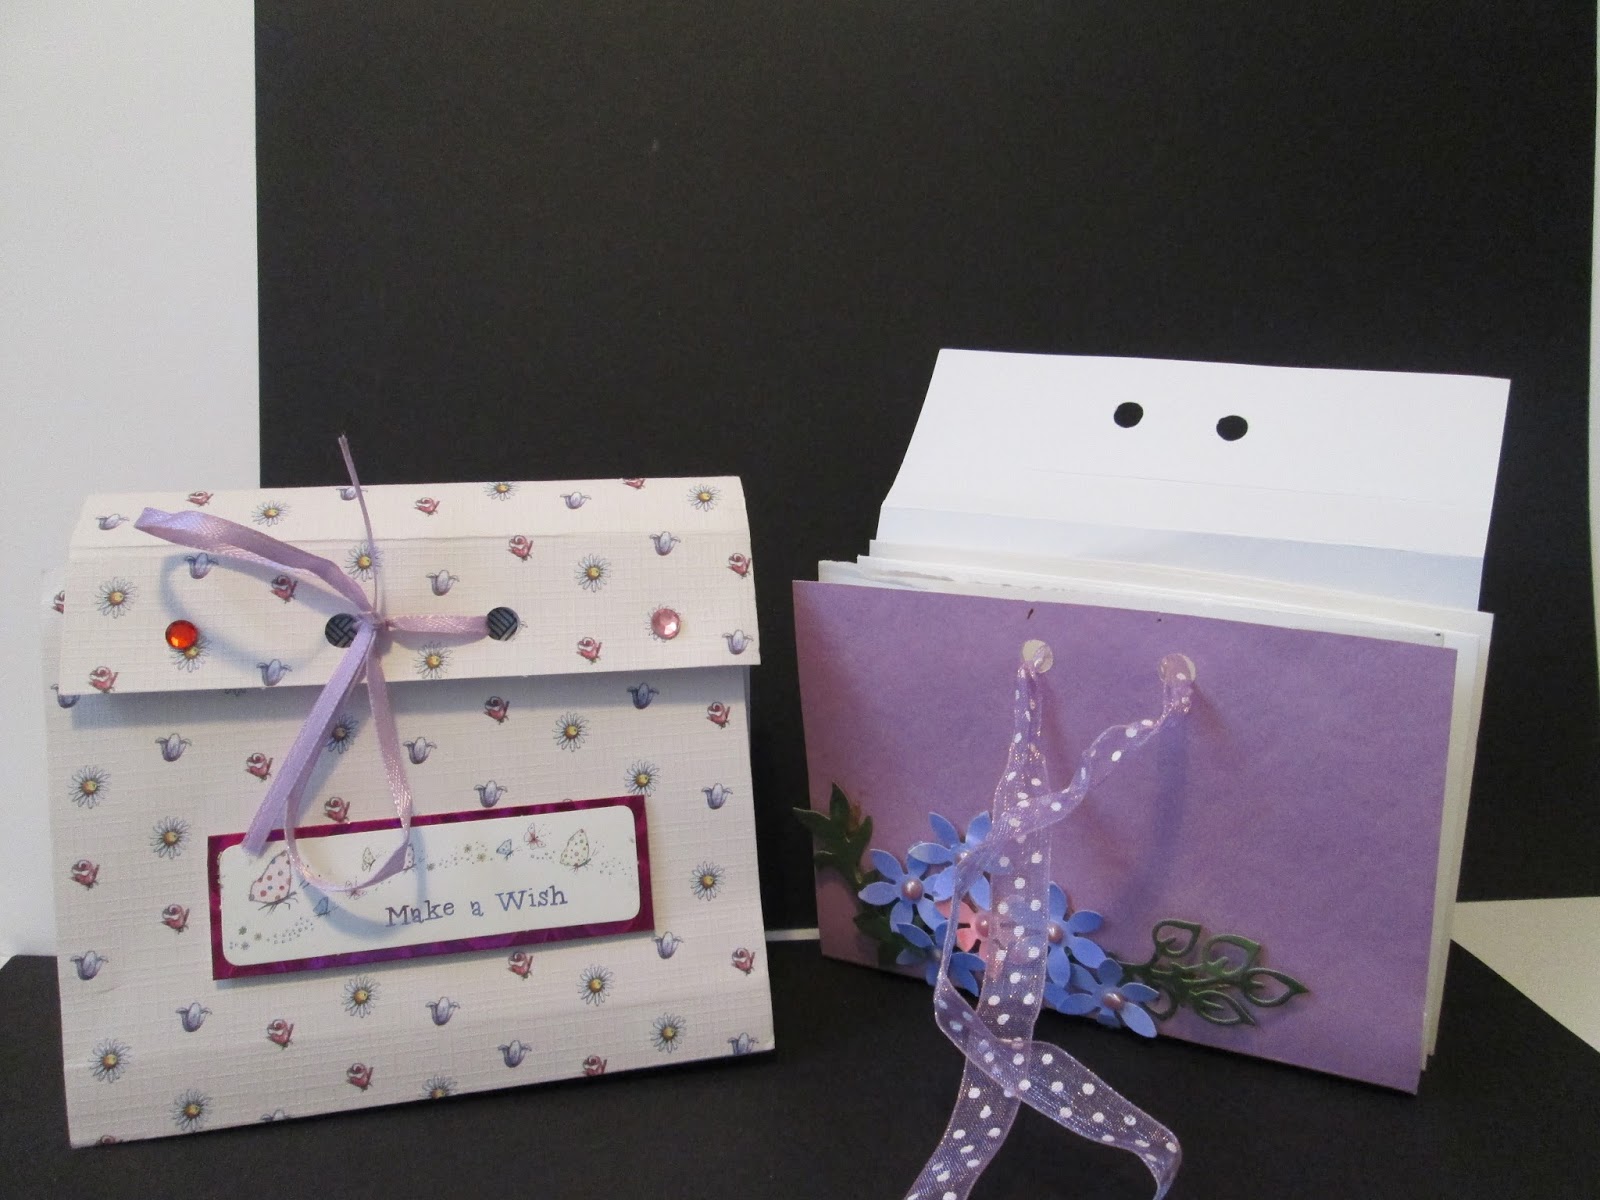
I made 4 different folds cards.

I made a zigzag card, an acetate step card, a stair card and a box card.  I was really pleases with the result.

I used Robert Addams graduation dies for the graduation words and pictures on all 4 cards and started with A4 card for each card.

Zigzag card - I used a polka dot embossing folder on white card for the layer (to make the base card - score 10 cm from each end, mark centre of first and third panels and score down to 5 cm at the top and bottom, then cut between these two score lines down the length of the card again at top and bottom, then fold each score as mountain and valley folds), I used gold miri card as the base card, then added die cuts.

Acetate Step Card - score at 1 inch, 2 inch, 3 inch, 4 inch, 6 inch and 6 inch and mountain and valley fold these score lines, turn card round and score at 1 inch and fold over.  Matt add layer in papers of your choice (I used white card with gold embossed lines on it), I stuck acetate to the front of the card (measuring from the bottom of the first score to the top and cut to size) and added die cuts.

Box card - score down the width at 7 cm, 14 cm, 21 cm and 28 cm, then down the length at 12 cm. fold into a box shape, the remainder (from 28 cm to 29 3/4 cm) use as a tab to stick the one end of the card to the other to form the box element.    Trim down each score line from top to middle, this creates the flaps at the top half of the card.  Stick tabs of card inside the box to use as anchors to attach your die cuts to.

Stair card ...... to be explained at a later date, this is for the next workshop.


TTFN

Happy Crafting

D

Sunday 7 June 2015

name birthday cards

Hello all,

I have not been able to show this card before as it was for my daughters birthday, can you guess her name......

These cards were made using the Card Creations + CD - fabulous tea and cakes.

They are so nice and unusual.


TTFN

Debs x

Friday 29 May 2015

my mo jo has returned......

hello,

I have not blogged for a while now as I have recently been through a very stressful time and lost my mojo.

But...... I have been crafting again and there are a few things I have made a few months ago and some recently - some future projects for the workshops.

Hope you like them.


TTFN Happy Crafting

Debs x