Hello all,
The new dates for 2015 are: (all Sundays at 10am - 12pm, at Lench's Trust, Ridgeacre Rd, Quinton, B32 2AQ).
Jan 4
Jan 18
Feb 1
Feb 15
Mar 1
Mar 15
Apr 12
Apr 26
May 10
Jun 7
Jun 23
Jul 5
Jul 19
Aug 2
Aug 16
Sept 6
Sept 20
Oct 4
Oct 18
Nov 1
Nov 15
Dec 6
I hope to see you soon.
Happy Crafting
TTFN
Debs x
Sunday, 24 August 2014
Saturday, 23 August 2014
its the most wonderful time of the year.......
Hello all,
I thought I would show you some Christmas projects we will be doing in the next 3 months.
There are grotto cards, wreath cards, step cards, scene cards, sleigh and reindeer's 3d project, table centre wreath and candle display, triangle tree cards, just to name a few projects.
Check out my blog for class time and dates. Come along and join the fun, everyone is welcome, and all levels of crafters are catered for.


Happy Crafting, TTFN.
Debs x
I thought I would show you some Christmas projects we will be doing in the next 3 months.
There are grotto cards, wreath cards, step cards, scene cards, sleigh and reindeer's 3d project, table centre wreath and candle display, triangle tree cards, just to name a few projects.
Check out my blog for class time and dates. Come along and join the fun, everyone is welcome, and all levels of crafters are catered for.
Happy Crafting, TTFN.
Debs x
Wednesday, 20 August 2014
Happy birthday aunty card
I was asked to make an aunty birthday card, I started with my favourite card size -8x8, and layered with silver miri card and pink pearl card, I die cut fancy frames in silver and pink, and also flowers, then I die cut a basket and made some flowers and buds from tonic flower punches and placed them in the basket. Which I placed in the centre of the card. I finished with a ribbon and a happy birthday and aunty sentiment which I inked and shaped.
What do you think?
Happy Crafting
Ttfn
Debs xx

Birthday card -sister
I had been asked to do a flower card for someone's sister, so I started with an 8x8 card blank, and used the beautiful corner die from pink frog crafts on all 4 corners, using a peel off sentiment from pinflair for sister I out that in the centre of the card and added flowers which I made from tonic stamp and punch range, which I embossed, I added flora and gold butterflying and swirls.
Hope she likes to it.
Ttfn
Happy Crafting.
Debs xx

Sunday, 17 August 2014
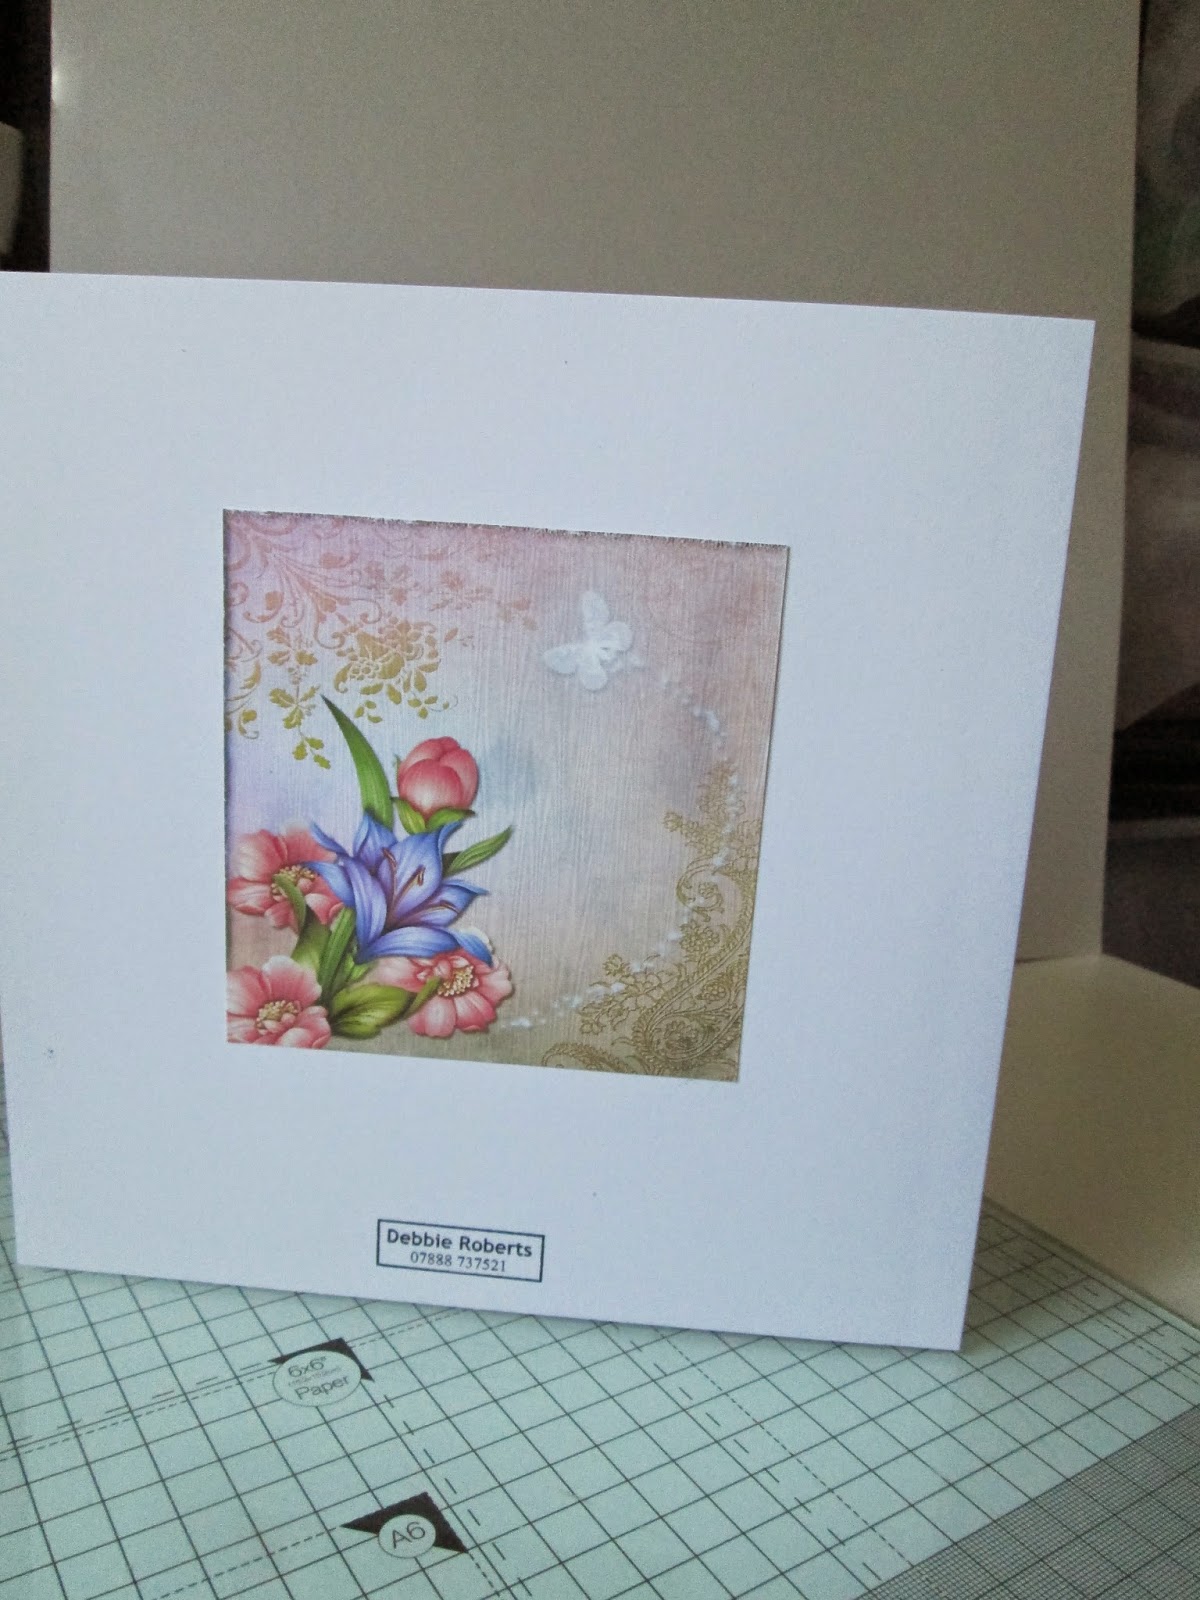
Acetate Flower Card
Hello all,
I decided to make an 8x8 acetate flower card, I started with an 8x8 white card blank, and printed some backing papers, inserts and toppers from Jem's Designs Petals and Wings CD rom, I printed two copies of the topper so I could create decoupage, I matt and layered gold miri and a background paper on the front of the card, I took the topper and matt on to gold miri card and added the decoupage, I tend took a piece of acetate 3 cm too long and scored at 1cm from each end and wrapped round the topper and stuck to the centre of the card.
On the inside I stuck an insert and a picture of the topper and on the back of the card, I finished with another topper.
I liked this card so much I made a couple of them.
Hope you like it too.


TTFN
Happy Crafting
Debs x
I decided to make an 8x8 acetate flower card, I started with an 8x8 white card blank, and printed some backing papers, inserts and toppers from Jem's Designs Petals and Wings CD rom, I printed two copies of the topper so I could create decoupage, I matt and layered gold miri and a background paper on the front of the card, I took the topper and matt on to gold miri card and added the decoupage, I tend took a piece of acetate 3 cm too long and scored at 1cm from each end and wrapped round the topper and stuck to the centre of the card.
On the inside I stuck an insert and a picture of the topper and on the back of the card, I finished with another topper.
I liked this card so much I made a couple of them.
Hope you like it too.
TTFN
Happy Crafting
Debs x
Friday, 15 August 2014
barbie wedding card....
I have been asked to make a barbie and Ken wedding card
Well, it's got to be pink, with hearts and gems. So, I started with a piece of A3 card making an A4 card blank, I matt with pick miri card and layered with pink rose paper. I printed pictures of barbie and Ken and sentiments and die cut, I die cut pink hearts for the sentiments and layered all on the card adding ribbon and mini hearts and gems.
Ttfn
Debs x

Thursday, 14 August 2014
Call of duty card.....
I was asked to make a card for a 15 year old boy who is interested in PlayStation games especially call of duty.
So starting with an a4 sheer of black card, I folded in half and used side on, I matted with silver miri card and typed sentiments in white on black background and layered on silver miri card. I printed an image of call of duty and matted on to silver and black card, finally I cut out a picture of a controller and out card together.
Hope he likes it.
Ttfn
debs x

Sunday, 10 August 2014
Tiddly Inks Christmas Skater Wryn
Hello again,
I am in the swing on all things Christmas now, I have brought a lovely new digi stamp from Tiddly Ink Stamps, they are so nice and so easy to colour in. The image I have used for this card is Skater Wryn. You can get Tiddly Inks stamps from the website below.
www.tiddlyinks.com
I started with an 8x8 card blank, and embossed a piece of centura pearl card with the Crafter's Companion A4 embossing folder, I then trimmed to 7.5 inches.
I took a piece of silver miri card and trimmed to 7.75 inches.
I matted the silver onto the white base card, then matted the snow white centural pearl embossed card on top of the silver card.
Using the Spellbinder poinsettia die, I die cut and inked (with fired brick distress ink through the die) 2 poinsettia's and some holly (inked with forest moss distress ink through the die). I added Pin Flair liquid pearls, red for the holly berries and white for the centre of the poinsettia's.
I coloured Skater Wryn with the following Spectrum Noir colours:
Hair GB7, GB9, EB3
Skin FS 1, FS3, FS4, PP1
Clothes DR5, DR6, DR7
Skates BG5, BG7
I cut out my image and added glitter where the fir is on her dress and hat and skates.
I shaped and placed Skater Wryn in the centre of my card and placed a poinsettia and holly in top left and bottom right corners, and finally using Marianne Design Collectables I die cut the message frame and stamped "Let it snow" in the die cut, using Momento ink.
I then designed my own insert and placed inside the card to finish.
This is an entry for the design team call.
Hope you like it.
Happy Crafting, TTFN,
Debs xx
Thursday, 7 August 2014
Tiddly Inks Design Call.....
Hello all,
I have decided to enter the Tiddly Inks Design Team Call - why - because I love their stamps, they are so cute and versatile, and for those of you who know me, I started crafting as a stamper and still love it now, you can't beat a bit of stamping and colouring to make your day feel bright, its wonderful to see the images grow before your eyes.
Please go to the following website for Tiddly Ink Stamps: www.tiddlyinks.com.
So this is how I made the card.
I started with an 8x8 card blank, and matted silver miri card and topped with Crafter's Companion SWALK Winter Cheer backing paper which I printed from the CD. I used a quickie glue pen and added glitter to the snowflake background.
I also cut a length of silver miri card and a slightly narrower length of snowflake backing paper and matt the paper on to the silver miri card to make a ribbon border across the bottom of the card.
Using a die, I cut a bunting in red to go across the corner of the card.
I used My Craft Studio Embellishment Attic to print out some poinsettia's and glittered and added liquid pearl drops and layered on top of each other to create two poinsettia's embellishments.
I used the Tiddly Inks Willow the Christmas Fairy as my image as I think she is so cute and so versatile to use. I coloured her with Spectrum Noir Pens in traditional Christmas colours, reds DR6,5,3,2, but fancied blue boots BT8,7,4 and skin, FS4,3,2, PP1 and hair LY3,2,1,TN2,1, the wings I used PP2,1 and blender pen and finally the sack full of presents I used TN3,2,1.
Using a quickie glue pen, I added holographic glitter to her hat, dress and wings to give her sparkle.
I then used a die frame to cut her out and used tumbled glass Distress Inks to shade around the edge of the die cut topper to make her pop.
I really love this image and can think of so many more ways of colouring her and using her on cards.

I hope you like my interpretation of this image.
Happy Crafting
Debs x
I have decided to enter the Tiddly Inks Design Team Call - why - because I love their stamps, they are so cute and versatile, and for those of you who know me, I started crafting as a stamper and still love it now, you can't beat a bit of stamping and colouring to make your day feel bright, its wonderful to see the images grow before your eyes.
Please go to the following website for Tiddly Ink Stamps: www.tiddlyinks.com.
So this is how I made the card.
I started with an 8x8 card blank, and matted silver miri card and topped with Crafter's Companion SWALK Winter Cheer backing paper which I printed from the CD. I used a quickie glue pen and added glitter to the snowflake background.
I also cut a length of silver miri card and a slightly narrower length of snowflake backing paper and matt the paper on to the silver miri card to make a ribbon border across the bottom of the card.
Using a die, I cut a bunting in red to go across the corner of the card.
I used My Craft Studio Embellishment Attic to print out some poinsettia's and glittered and added liquid pearl drops and layered on top of each other to create two poinsettia's embellishments.
I used the Tiddly Inks Willow the Christmas Fairy as my image as I think she is so cute and so versatile to use. I coloured her with Spectrum Noir Pens in traditional Christmas colours, reds DR6,5,3,2, but fancied blue boots BT8,7,4 and skin, FS4,3,2, PP1 and hair LY3,2,1,TN2,1, the wings I used PP2,1 and blender pen and finally the sack full of presents I used TN3,2,1.
Using a quickie glue pen, I added holographic glitter to her hat, dress and wings to give her sparkle.
I then used a die frame to cut her out and used tumbled glass Distress Inks to shade around the edge of the die cut topper to make her pop.
I really love this image and can think of so many more ways of colouring her and using her on cards.
I hope you like my interpretation of this image.
Happy Crafting
Debs x
Wednesday, 6 August 2014
handbag card
Hello all,
I decided I enjoy the black and white theme of cards, so came up with the idea of doing a shaped card - a handbag shaped card.
Using Jem's Designs Petals and Flowers CD I printed out backing paper and butterfly toppers.
I started with an A4 piece of black card folded in half and drew a bag shape and cut it out, I then drew round this in silver miri card and trimmed slightly smaller to create a matt, then again with the backing paper to create a layer.
I drew round the top of the bag and created a clasp in sliver and backing paper both for the back and front of the bag and finally created two handles again for the front and back of the bag.
I cut out the butterflies and glittered them and added to the bag and added gems for stud fastenings and finally added a punched/stamped flower front Tonic punch and stamp set and added embossing power to emboss it.
Below is a picture of the front and back of the card.


It will be a future project at our workshops.
TTFN, happy crafting.
Debs xx
Engagement card 2.....
hello again,
well, they loved the engagement card so much they wanted another, same picture, same colours...... but needs to look different - who can't resist a challenge.
Again I started with an 8x8 base card and matt and layered in silver miri card and black card.
I cut a matt and layer from black card and from silver miri card, a circle and a larger scalloped circle.
I took the photo of the ring into My Craft Studio graphics programme and created a shadow image and put the text over the top, so you could still see the picture as a ghost image behind the sentiment. I then dded this to the topper after cutting into a circle.
I added a ribbon bar from silver miri card and black card and added gems, I added the topper to the right side of the card and added gems round the scalloped frame.
I added a ribbon and hand made a red rose which I added to the ribbon.
For the inside, on the right side insert, I put a small picture of the right, and on the left the sentiment.
And this is the end result. The same but different.


TTFN
Debs xx
well, they loved the engagement card so much they wanted another, same picture, same colours...... but needs to look different - who can't resist a challenge.
Again I started with an 8x8 base card and matt and layered in silver miri card and black card.
I cut a matt and layer from black card and from silver miri card, a circle and a larger scalloped circle.
I took the photo of the ring into My Craft Studio graphics programme and created a shadow image and put the text over the top, so you could still see the picture as a ghost image behind the sentiment. I then dded this to the topper after cutting into a circle.
I added a ribbon bar from silver miri card and black card and added gems, I added the topper to the right side of the card and added gems round the scalloped frame.
I added a ribbon and hand made a red rose which I added to the ribbon.
For the inside, on the right side insert, I put a small picture of the right, and on the left the sentiment.
And this is the end result. The same but different.
TTFN
Debs xx
Subscribe to:
Comments (Atom)